Thursday, January 12, 2023

Use GitHub Actions and Terraform to provision EC2 instance

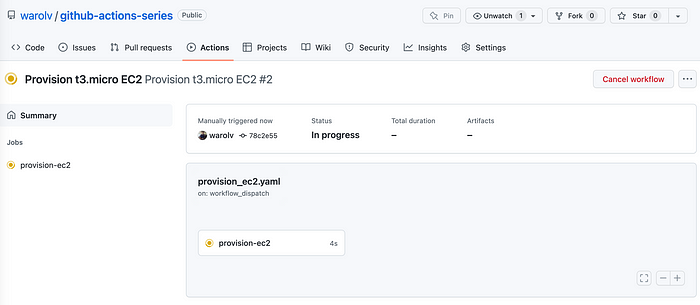
 In this tutorial, I will create a simple and practical example of how to provision EC2 instance with Github Actions and Terraform. I will use workflow_dispatch type of workflow which is triggered manually by the user, using Terraform Github action from HashiCorp.

Goal

Deploy EC2 instance of t2.micro size to your AWS account using Github Actions and Terraform.

I will use ‘workflow_dispatch’ event for this, which is manually triggered.

GitHub Actions is a continuous integration and continuous delivery (CI/CD) platform that allows you to automate your build, test, and deployment pipeline. You can create workflows that build and test every pull request to your repository, or deploy merged pull requests to production.

GitHub Actions goes beyond just DevOps and lets you run workflows when other events happen in your repository. For example, you can run a workflow to automatically add the appropriate labels whenever someone creates a new issue in your repository.

GitHub provides Linux, Windows, and macOS virtual machines to run your workflows, or you can host your own self-hosted runners in your own data center or cloud infrastructure.

This event occurs when someone triggers a workflow run on GitHub or sends a POST request to the "Create a workflow dispatch event" endpoint. For more information, see "Events that trigger workflows."

GitHub Actions makes it easy to automate all your software workflows, now with world-class CI/CD. Build, test, and deploy your code right from GitHub. Make code reviews, branch management, and issue triaging work the way you want.

Let’s do it


have the Access key id and Secret access key which will be added as secrets to Github repo.

Go to your Github repository -> settings -> secrets -> actions
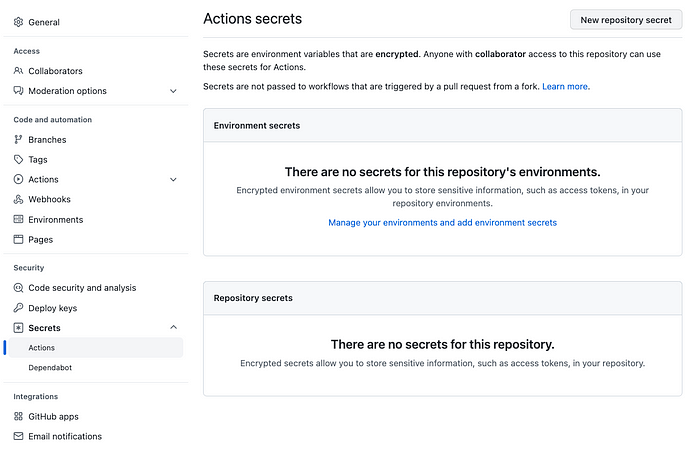

Need to add two secrets: AWS_ACCESS_KEY_ID and AWS_SECRET_ACCESS_KEY (Secret access key) which will be used later in the workflow


Add AWS_SECRET  and also default region too in the same way.


Overview of the Terraform script to provision EC2 instance and install tomcat

  • The provisioned instance is based on ubuntu AMI.
  • The instance type is t2.micro.
  • The instance will be provisioned to default VPC | subnet | security group.
  • Need to use your previous key pair to connect with the provisioned instance.
  • EC2 will be provisioned to ‘us-east-1’ region. (or Use your current region)

AWS console -> EC2 -> Key Pair -> Create Key Pair


To use this with github we need to create a S3 bucket  so that we can use it to store our state file.

# main.tf


provider "aws" {
  region = "us-east-1"
}

terraform {
  backend "s3" {
    bucket = "BUCKET-NAME"
    key    = "NAME YOU WANT"
    region = "us-east-1"
  }
}


#First Tomcat server
#this ami is for us-east-1 for ubuntu 22 pls change your own to your region
resource "aws_instance" "dev" {
  ami           = "ami-007855ac798b5175e"
  instance_type = "t2.micro"
  vpc_security_group_ids = [aws_security_group.ec2_sg.id]
  key_name = "keyname"
  user_data = <<-EOF
  #! /bin/bash
  sudo apt-get update
  sudo apt-get install default-jdk -y
  sudo apt-get install tomcat9 -y
  sudo apt-get install tomcat9-docs tomcat9-examples tomcat9-admin -y
  sudo cp -r /usr/share/tomcat9-admin/* /var/lib/tomcat9/webapps/ -v
  EOF

  tags = {
    Name = "Dev"
  }
}
#Second Tomcat server
#this ami is for us-east-1 for ubuntu 22 pls change your own to your region
resource "aws_instance" "QA" {
  ami           = "ami-007855ac798b5175e"
  instance_type = "t2.small"
  vpc_security_group_ids = [aws_security_group.ec2_sg.id]
  key_name = "keyname"
  user_data = <<-EOF
  #! /bin/bash
  sudo apt-get update
  sudo apt-get install default-jdk -y
  sudo apt-get install tomcat9 -y
  sudo apt-get install tomcat9-docs tomcat9-examples tomcat9-admin -y
  sudo cp -r /usr/share/tomcat9-admin/* /var/lib/tomcat9/webapps/ -v
  EOF

  tags = {
    Name = "QA"
  }
}

# security.tf


resource "aws_security_group" "ec2_sg" {
    name = "(use a name you want)"
    description = "EC2 SG"

    ingress {
        from_port = 22
        to_port = 22
        protocol = "tcp"
        cidr_blocks = ["0.0.0.0/0"]
    }

    ingress {
        from_port = 8080
        to_port = 8080
        protocol = "tcp"
        cidr_blocks = ["0.0.0.0/0"]
    }


    #Allow all outbound
    egress {
        from_port = 0
        to_port = 0
        protocol = "-1"
        cidr_blocks = ["0.0.0.0/0"]
    }
tags = {
    Name = "(use a name you want)"
  }
}

Create a workflow with Github Actions to provision EC2 instance

  • configure-aws-credentials’ action used to set AWS credentials with docker container to be used by Terraform.
  • You need to define name of EC2 instance using terraform variables: TF_VAR_ec2_name, before TF runs.
  • Used setup-terraform action from HashiCorp.
  • Used GitHub-hosted runner: ubuntu-latest.

To see your workflow in actions -> workflows, first need to create 2 files in ‘.github/workflows’ and add it to your repository.

# deploy.yml


name: Terraform
on:
  workflow_dispatch:
    inputs:
      ec2-name:
        description: EC2 name
        required: true
        default: 'ec2 name'
        type: string

jobs:
  deploy:
    runs-on: ubuntu-latest
    steps:
    - name: Checkout
      uses: actions/checkout@v2
    - name: Setup Terraform
      run: |
        VERSION=$(curl --silent https://checkpoint-api.hashicorp.com/v1/check/terraform | jq -r .current_version)
        wget https://releases.hashicorp.com/terraform/$VERSION/terraform_${VERSION}_linux_amd64.zip
        unzip terraform_${VERSION}_linux_amd64.zip
        sudo mv terraform /usr/local/bin/
    - name: Terraform init
      run: terraform init
    - name: Terraform plan
      run: terraform plan
    - name: Terraform apply
      run: terraform apply -auto-approve
env:
  AWS_ACCESS_KEY_ID: ${{ secrets.AWS_ACCESS_KEY_ID }}
  AWS_SECRET_ACCESS_KEY: ${{ secrets.AWS_SECRET_ACCESS_KEY }}


#destroy.yml


name: Terraform Destroy
on:
  workflow_dispatch:
    inputs:
      destroy:
        description: 'Trigger a destroy action'
        required: true

jobs:
  destroy:
    runs-on: ubuntu-latest
    steps:
    - name: Checkout
      uses: actions/checkout@v2
    - name: Setup Terraform
      run: |
        VERSION=$(curl --silent https://checkpoint-api.hashicorp.com/v1/check/terraform | jq -r .current_version)
        wget https://releases.hashicorp.com/terraform/$VERSION/terraform_${VERSION}_linux_amd64.zip
        unzip terraform_${VERSION}_linux_amd64.zip
        sudo mv terraform /usr/local/bin/
    - name: Terraform init
      run: terraform init
    - name: Terraform destroy
      run: terraform destroy -auto-approve
env:
  AWS_ACCESS_KEY_ID: ${{ secrets.AWS_ACCESS_KEY_ID }}
  AWS_SECRET_ACCESS_KEY: ${{ secrets.AWS_SECRET_ACCESS_KEY }}


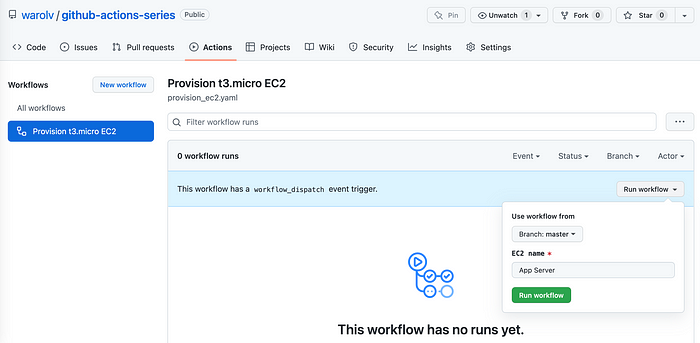
I am using ‘workflow_dispatch’ type of workflow which is triggered manually.
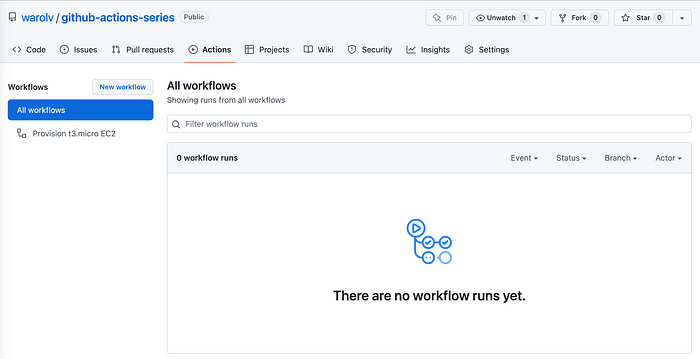
Click ‘Run workflow’

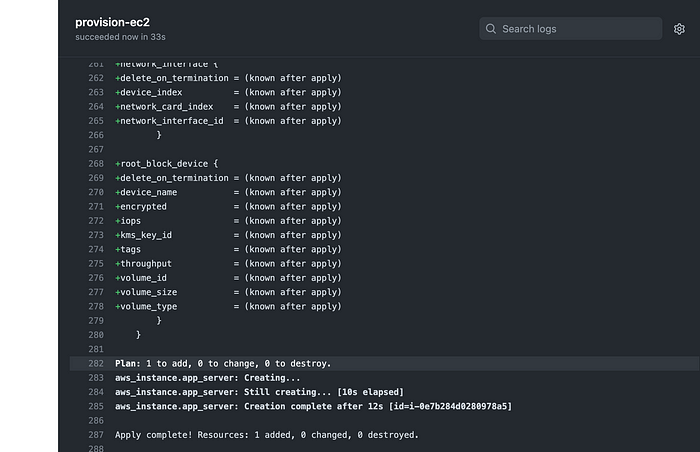
You can see using AWS console that EC2 instance created! and if you go to s3 bucket you created you will find the folder of the keyname you choose.

Now try to connect to this instance using ‘ur ssh key’


Success!

Conclusion

In this tutorial, I explained how to provision EC2 instances using Terraform and Github Actions workflow, I used GitHub-hosted runner and workflow_dispatch type of workflow which is triggered manually.

No comments:

Post a Comment

Jenkins Scripted Pipeline - Create Jenkins Pipeline for Automating Builds, Code quality checks, Deployments to Tomcat - How to build, deploy WARs using Jenkins Pipeline - Build pipelines integrate with github, Sonarqube, Slack, JaCoCo, Nexus, Tomcat

  Jenkins Scripted Pipeline - Create Jenkins Pipeline for Automating Builds, Code quality checks, Deployments to Tomcat - How to build, depl...